Showing posts with label #DIY. Show all posts

Tuesday, September 4, 2012

DIY - Wooden Bench Makeover


By Patricia

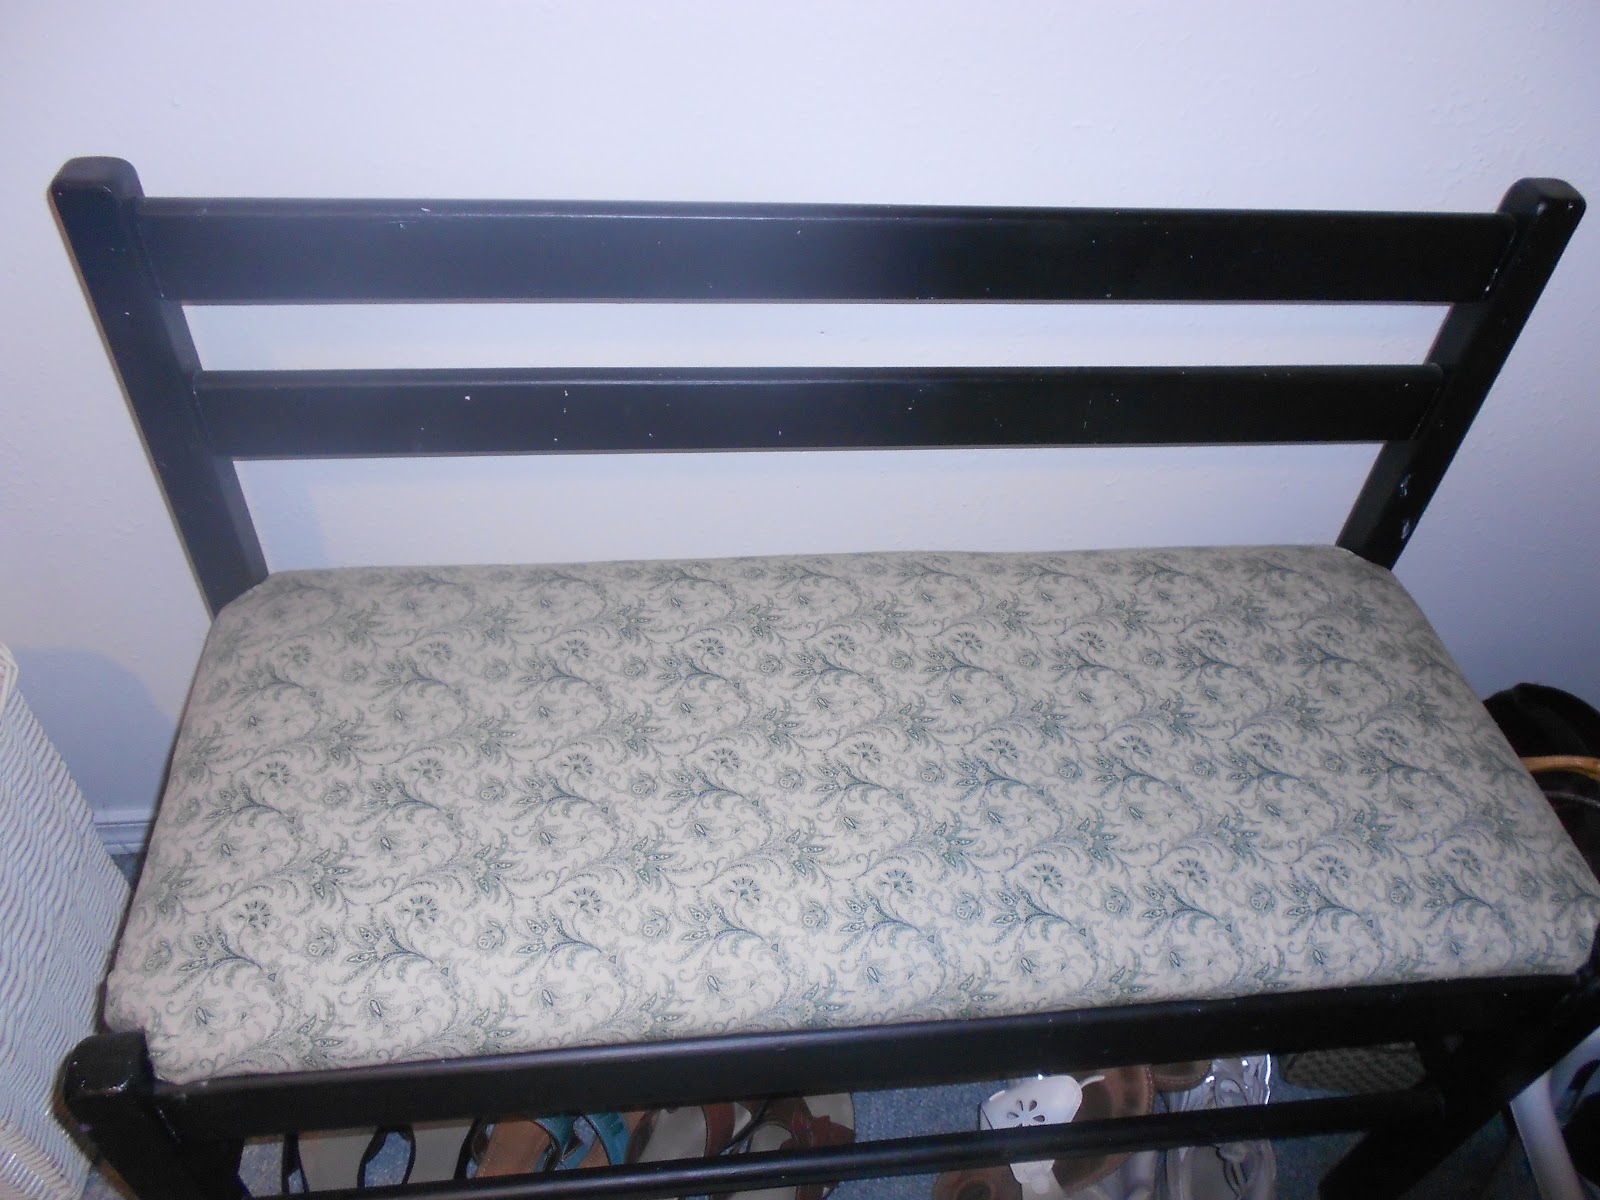
I've had this old bench around for years. I bought it at a yard sale, and it's been passed back and forth between my daughter and I a few times. I thought it really needed a makeover, and I was tired of the black wood and old fabric.
This is such an easy project to do, all I needed was some white paint and some new fabric. The new fabric I decided to use was actually an old drapery panel that I bought at the Good will for a few dollars. This was going to be a fast and inexpensive way to give new life to an old piece of furniture.


I took the bench outside and took off the seat, super easy since it just lifts out. It's a gorgeous day for an outside project!


I only had to do a little bit of sanding before I could apply the first coat of paint. Luckily the old paint was in good condition, but I would need to apply two coats of paint because I was applying white on the black paint.


Applying the first coat of paint. The can said it covers in one coat, but I could already see that wasn't going to work on my bench.


Here is the bench after two coats of paint. I let the first coat of paint dry over night because it was enamel, and it seemed to be drying slowly. Now on to the bench seat.


This is the drapery panel that I cut to size. I measured how much I needed for the bench seat, then I added four inches to each side. Using the staple gun made it very fast and easy to adhere the fabric to the seat. Super simple!


Going around the corners of the of the seat was a little trickier, but you just have to pull the fabric taunt and then staple it down. I didn't remove the very first layer of fabric, but it didn't interfere with stapling the new fabric on.


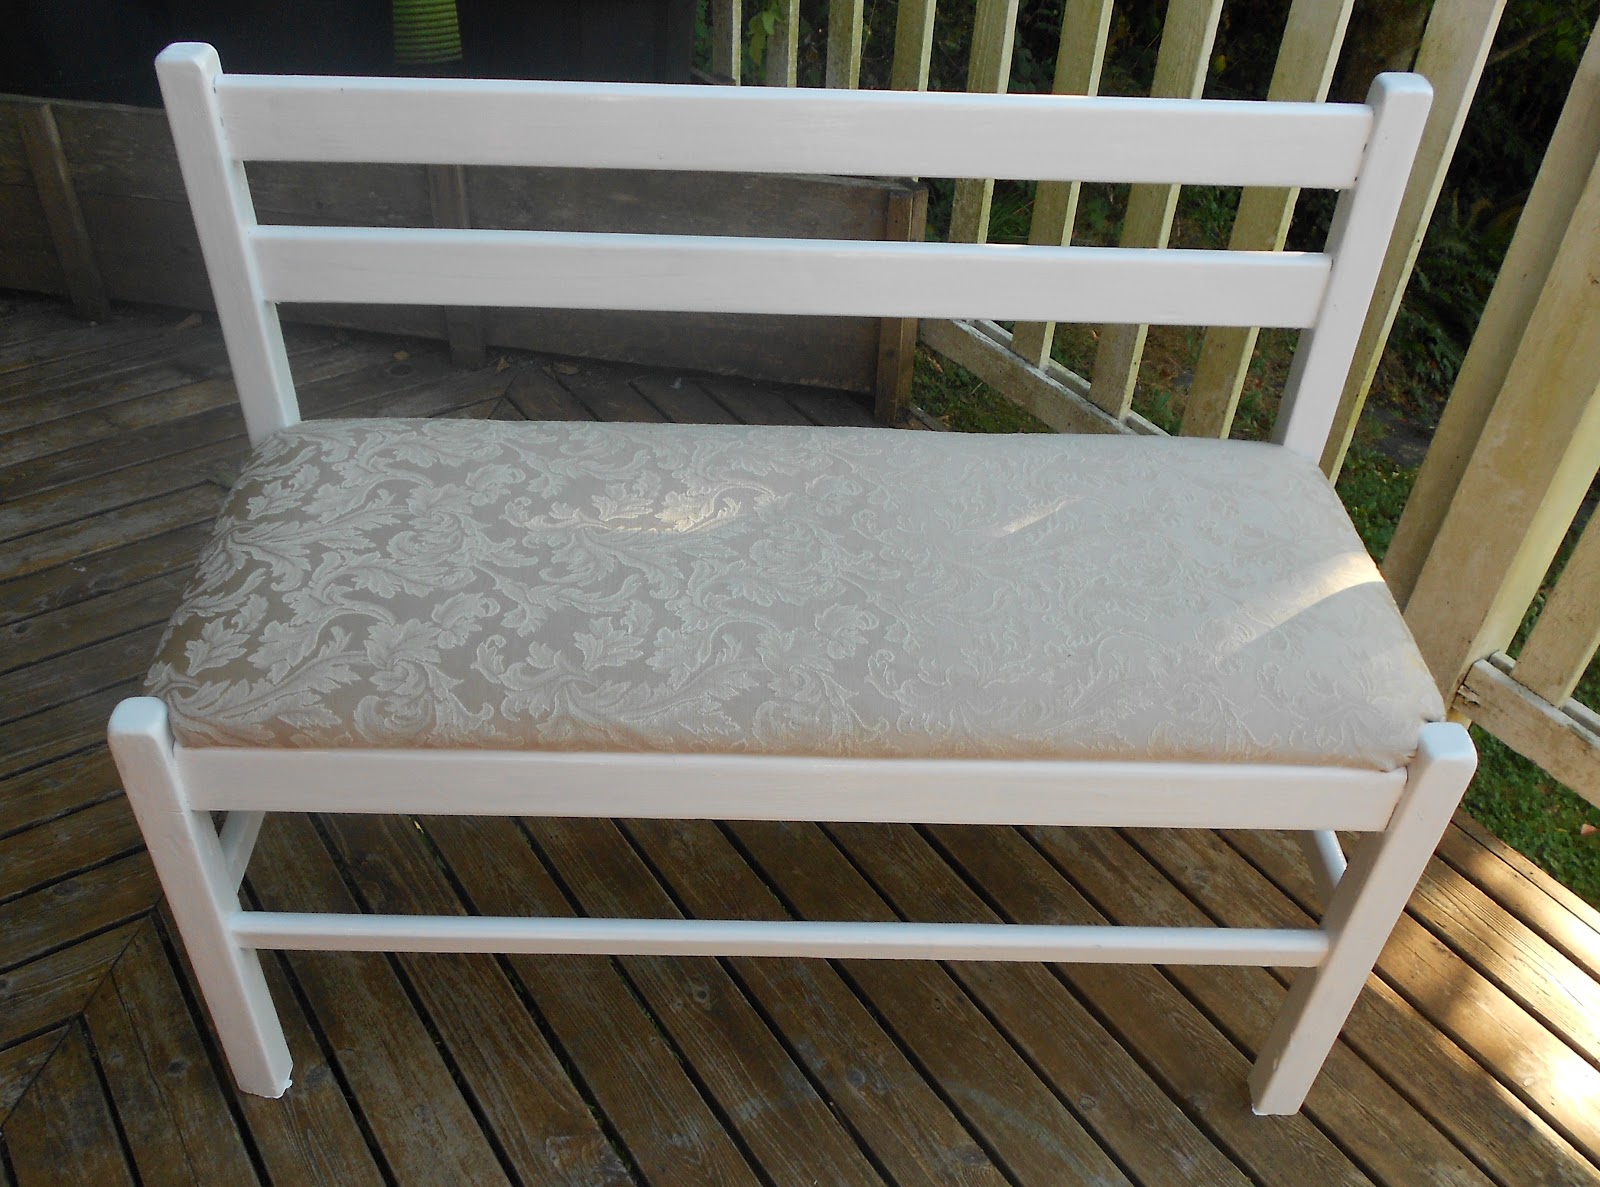
Here is the bench all finished! I love the light colors and what a big change it is. This DIY project was very easy and inexpensive to do. Love it!

Saturday, August 18, 2012

DIY Silver Platter Chalkboard

Recently I tried using chalkboard paint for the first time and I found it very easy and creative. I have seen many DIY projects using chalkboard paint on walls and wood surfaces but I wanted to try something new. Without really knowing what I was looking for I headed to the nearest goodwill to either find a wooden box of some sort or just a flat surface to experiment on. As I was walking down one of the aisles this fabulous silver platter caught my eye and I knew just what to do with it. So I purchased this bargain for only $3.00 and started my project!


Here is all you need for a DIY silver platter chalkboard:

  • Silver platter of your choice
  • 1 container of chalkboard paint (a little goes a long way)
  • Paintbrushes, Tape
  • 1 can white spray paint
The first step is to tape off the edges so you don't accidentally spray the sides so you have a nice clean silver border.

After you tape the edges your can begin spray painting the middle so your chalkboard paint will bond to the metal. I did two light coats and then let it dry for about 20 minutes.

After your spray paint dries you can peel the tape off slowly and you'll have a nice clean edge.

I took the tape off before I did the chalkboard paint layer because I wanted to be sure to cover all the white by slowly hand painting it but you can do it either way. After the spray paint has dried your ready to apply the chalkboard paint! I would recommend doing about three layers to make sure there's a nice thick coat on there. 

And viola! You're now the proud owner of a chalkboard silver platter! The directions say to wait a full 24 hours to write on the board so the paint can set. So the next day i wrote a note to myself and put it in my kitchen!
This project is simple and very affordable. Overall I spent around 10 dollars on everything and had a great time being creative and enjoyed making my own chalkboard that is really helpful in my busy life!

-Posted by Megan